Hands-On @ The Toy Factory Workshop: The Airplane
By Dan Viau
Hands On @ The Toy Factory Workshop: The Airplane.
Turning a block of white pine into an old-fashioned wooden toy airplane is a multi-step process in our workshop.
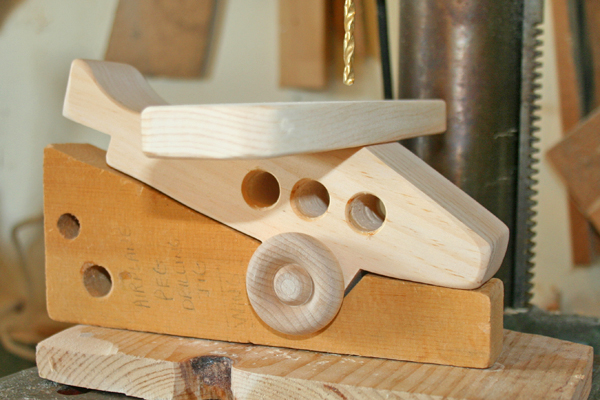
It starts, like all our wooden toys, with simple templates we’ve designed – in this case for the airplane body, wing, tail & propellor.
Step 1:
We trace the airplane body templates on blocks of 2″ pine. Then we cut them out with our bandsaw, and drill holes for windows and wheels. We cut the other parts – wings, tails and propellors – from pine and maple using our table saw and bandsaw.
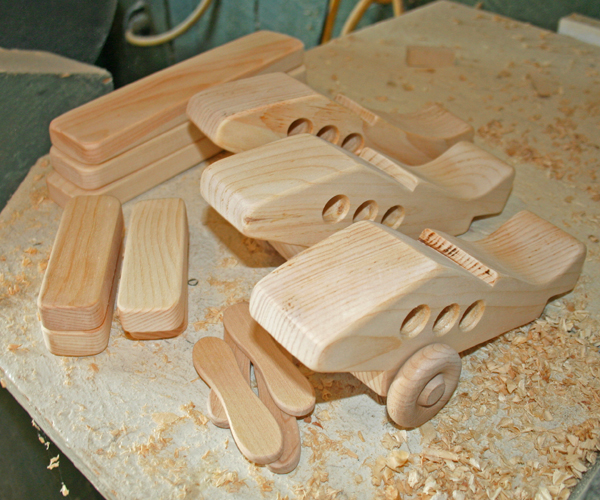
Toymakers Tip: To keep costs down, we try to always make our toys in “bunches” – 6 or 10 or 12 at a time. That way, we only set up our jigs and tools once, but we use them several times before moving to the next step in the toymaking process. It saves time, which helps us keep our prices low and save money for our customers.
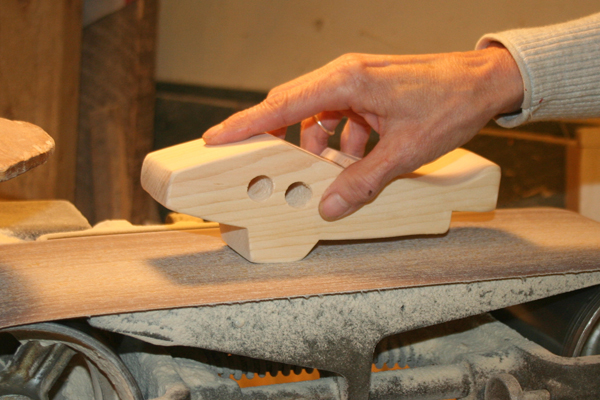
Step 2: Sanding. And more sanding.
Kathy is sanding an airplane body on one of our big 6″ x 48″ belt sanders. It takes strong wrists, dexterity and plenty of practice to hold, turn and manipulate the airplane, to make sure every surface, edge and corner is perfectly smooth.
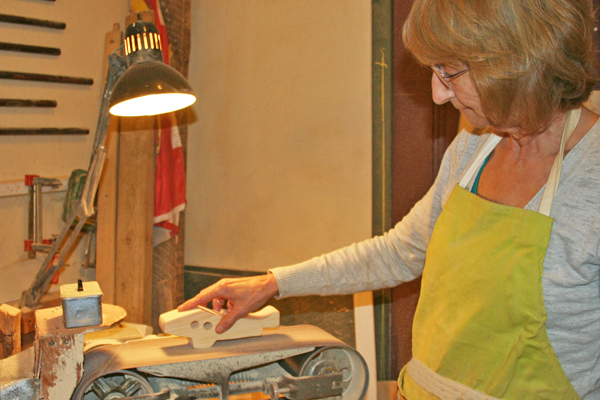
Kathy will use two other specialized sanders and a unique grinder before all the airplane parts are ready – no rough surfaces, sharp edges or pointy corners.
Toymakers Tip: With most toys, we spend more time sanding than on any other step in the toy-making process. That’s because Smooth = Safe.
Step 3: Pegging the wings & tail. This step is the most old-fashioned & unique: No Plastic or Metal Parts Found Here.
We use wooden pegs, white glue and sturdy clamps to secure the wings, tails and propellors to our toy airplanes. That means using special jigs, and a multi-step drilling and pegging process.

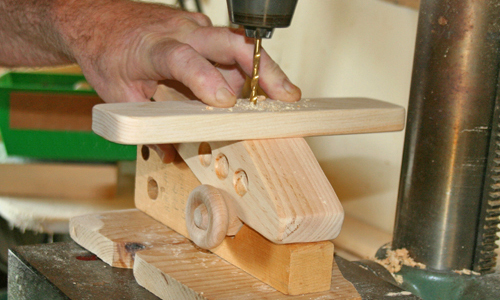
To allow us to drill down into the wing for the pegs that will attach it to the airplane, we fit the body into a special jig. It lowers the airplane’s nose, which levels the upper wing surface for easy drilling.
With white glue between the wing and the airplane, Dan holds the two pieces together, and drills the holes for the pegs.
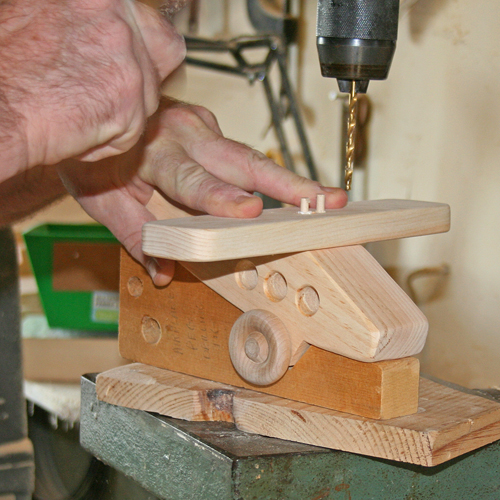
Next, with a drop of white glue in each hole first, the pegs are pushed into the holes through the wings. They’ll be tapped down tight with a little toymaking hammer to lock the wing onto the airplane body.
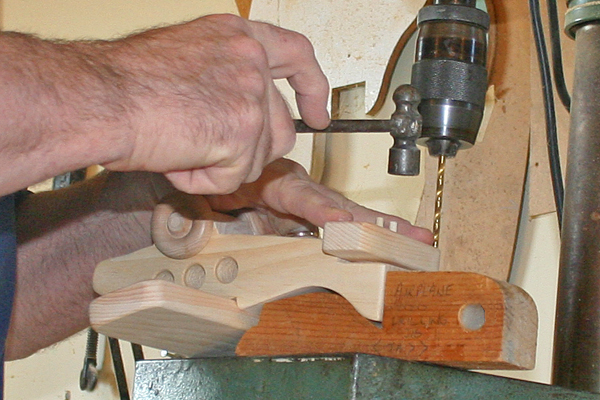
Here, the airplane is flipped over into another special jig for drilling and pegging the tail.
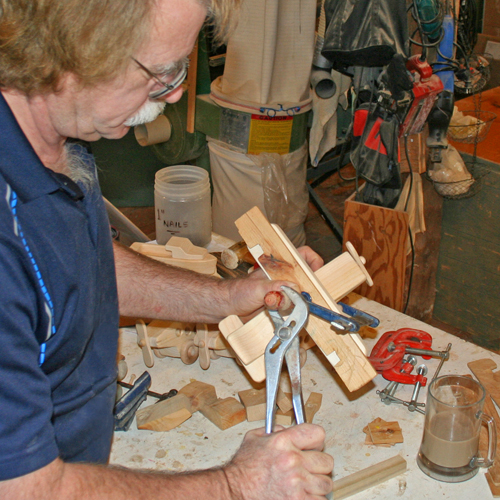
Step 4: It’s time to install the propellor, and there’s no wasting time. The airplane needs to get into its clamps quickly after the wing and tail pegs are put in, before the glue starts to dry.
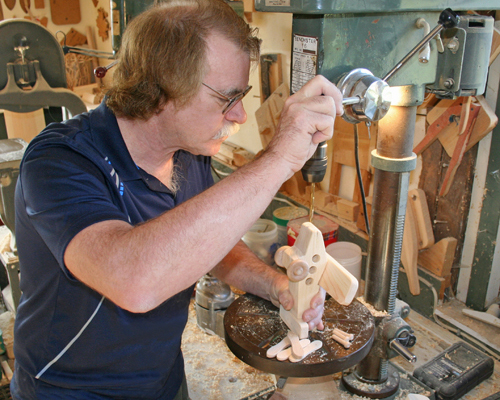
Step 5: Into the clamps. In 30+ years of toymaking, Dan has developed a knack for holding the airplane in its special jigs – inside an adjustable C-clamp – while tightening the clamp with his other hand. It’s not as easy as it looks.
Â
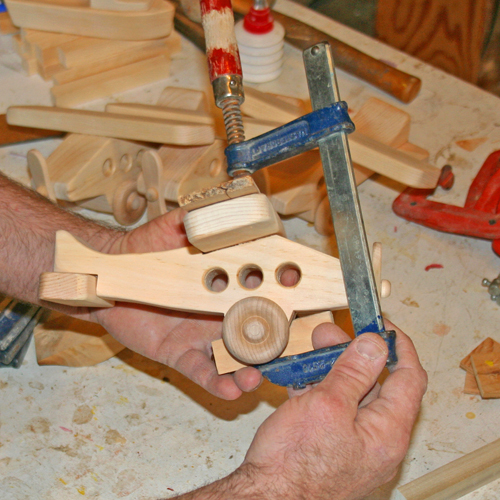
Notice how the little jig under the airplane makes that bottom surface level with the top surface of the wing, so the clamp will work properly. It also protect the airplane from the clamp – we tighten our clamps with a lot of force when making our toys. In toymaking, jigs are very important. We have dozens of original jigs in our workshop, designed specifically for making our wooden toys.
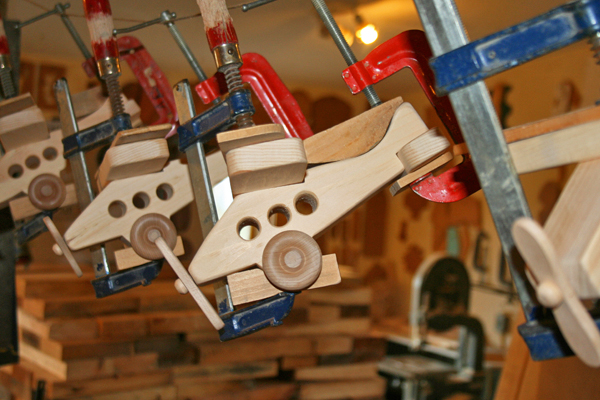
The Final Step – Time to Dry
With wings and tails securely clamped, our airplanes will hang to dry for 24 hours in our workshop.
When we remove the clamps the next day, we give the wings and tails a quick sanding to smooth off the tops of the pegs. Then, we give the propellors a test spin, and our new Airplanes fly out to their landing strip in our store.
Hands On @ The Toy Factory Workshop is a special feature designed to give our customers an exclusive look inside our toymaking workshop… where we make our wooden toys the “old-fashioned” way: handcrafted one toy at a time, with care and attention.Â
Shop for our Airplane – or to see all our Toy Factory Wooden Toys, please click here.